Introduction
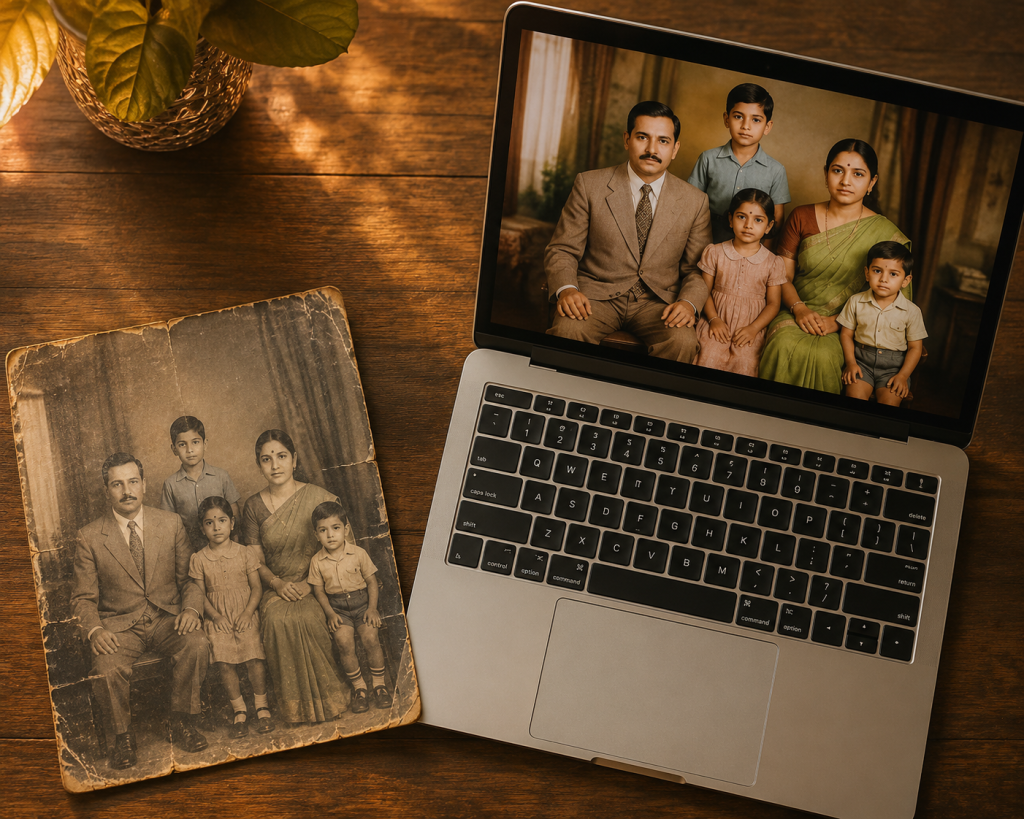
How to Restore Old Photos:Old photographs are windows into the past — faded portraits of grandparents, sun-bleached vacation snapshots, cracked and torn images of people and places that no longer exist. Time is not kind to physical photos, but modern tools and techniques make it possible to breathe new life into them. Whether you prefer a hands-on digital approach or want to hand the work to a professional, this guide covers everything you need to know.
Understanding the Types of Damage
Before you begin restoring a photo, it helps to understand what you’re dealing with. Common types of damage include:
Fading and discoloration. Exposure to light, humidity, and air causes colors to wash out and white areas to yellow or brown. Black-and-white photos often develop a sepia or greenish cast over time.
Physical damage. Tears, creases, scratches, and water stains are among the most common physical problems. Some photos develop surface cracks, especially if they were stored folded or in poor conditions.
Mold and foxing. Brown or reddish spots (called foxing) can appear on old paper-based photos, often caused by mold or oxidation of the paper fibers.
Loss of detail. Fine details — facial features, text, background elements — can become blurry or disappear entirely as the photo degrades.
Knowing the extent of the damage helps you choose the right restoration method and set realistic expectations for the outcome.
Step 1: Handle the Original With Care
Before you do anything else, protect the original photograph. Even a badly damaged print is irreplaceable.
- Handle photos by their edges only, using clean cotton gloves if possible.
- Never use adhesive tape to repair tears on the original — it causes more damage over time.
- Store originals in acid-free sleeves or archival boxes away from heat, light, and moisture.
- Do not attempt to clean mold or stains from the original without professional guidance.
The goal is to preserve the physical original even as you create a digital restoration.
Step 2: Digitize the Photo
A high-quality digital scan is the foundation of any restoration project.
Using a flatbed scanner is the gold standard. Aim for a resolution of at least 600 DPI (dots per inch) for standard-sized prints, and 1200 DPI or higher for small or heavily detailed photos. Most flatbed scanners come with software that lets you preview and adjust settings before scanning.
Using a smartphone camera is a practical alternative if you don’t have a scanner. Place the photo on a flat, evenly lit surface — ideally near a window with diffused natural light. Avoid using flash, which creates glare. Apps like Google PhotoScan or Microsoft Lens are specifically designed for digitizing printed photos and reduce reflections automatically.
Save your scan as a TIFF file if possible, as it preserves more data than a JPEG. Always keep an unedited copy of the original scan before you start making changes.
Step 3: Choose Your Restoration Tool
There are three main routes for digital photo restoration, depending on your skill level and budget.
Option A: AI-Powered Restoration Tools (Easiest)
Artificial intelligence has transformed photo restoration, making it accessible to everyone — no technical skills required. These tools can automatically remove scratches, correct fading, sharpen details, and even colorize black-and-white images.
Popular AI restoration tools include:
- Remini — A mobile app that excels at enhancing facial detail and sharpness. Ideal for portraits.
- MyHeritage In Color — Designed specifically for family history photos; it colorizes and enhances old images with impressive results.
- Adobe Lightroom (with AI features) — Good for correcting exposure, color, and noise in scanned photos.
- Luminar Neo — Offers AI-driven sky replacement, skin smoothing, and detail enhancement.
- GIMP with G’MIC plugin — A free, open-source option with restoration filters for more technically inclined users.
AI tools work best on photos with moderate damage. For severely torn or missing-section photos, manual editing will likely be needed.
Option B: Adobe Photoshop (Most Powerful)
Photoshop remains the industry standard for professional photo restoration. It requires more time to learn but gives you precise control over every aspect of the image.
Key tools and techniques in Photoshop include:
- Spot Healing Brush and Healing Brush — Removes dust, scratches, and small blemishes by blending surrounding pixels.
- Clone Stamp Tool — Copies pixels from one area to another; essential for repairing tears and filling in missing sections.
- Curves and Levels Adjustments — Restores contrast and brightness to faded images.
- Hue/Saturation — Corrects color casts and restores vibrancy to faded color photos.
- Content-Aware Fill — Intelligently fills in large missing or damaged areas using surrounding image data.
- Sharpen filters — Brings back soft or blurry detail.
Working on adjustment layers rather than directly on the image file is a best practice, as it allows you to undo changes at any point without degrading image quality.
Option C: Hire a Professional Restorer
For precious or severely damaged photos, hiring a professional photo restorer is well worth the investment. Professional restorers combine technical expertise with an artistic eye, and they can reconstruct missing faces, repair extensive water damage, and produce results that AI and amateur editing cannot match.
When choosing a professional:
- Ask to see a portfolio of before-and-after examples.
- Clarify what file formats and sizes you’ll receive.
- Confirm whether colorization, printing, or framing services are included.
- Expect to pay anywhere from $30 to several hundred dollars depending on the complexity of the work.
Step 4: The Restoration Process
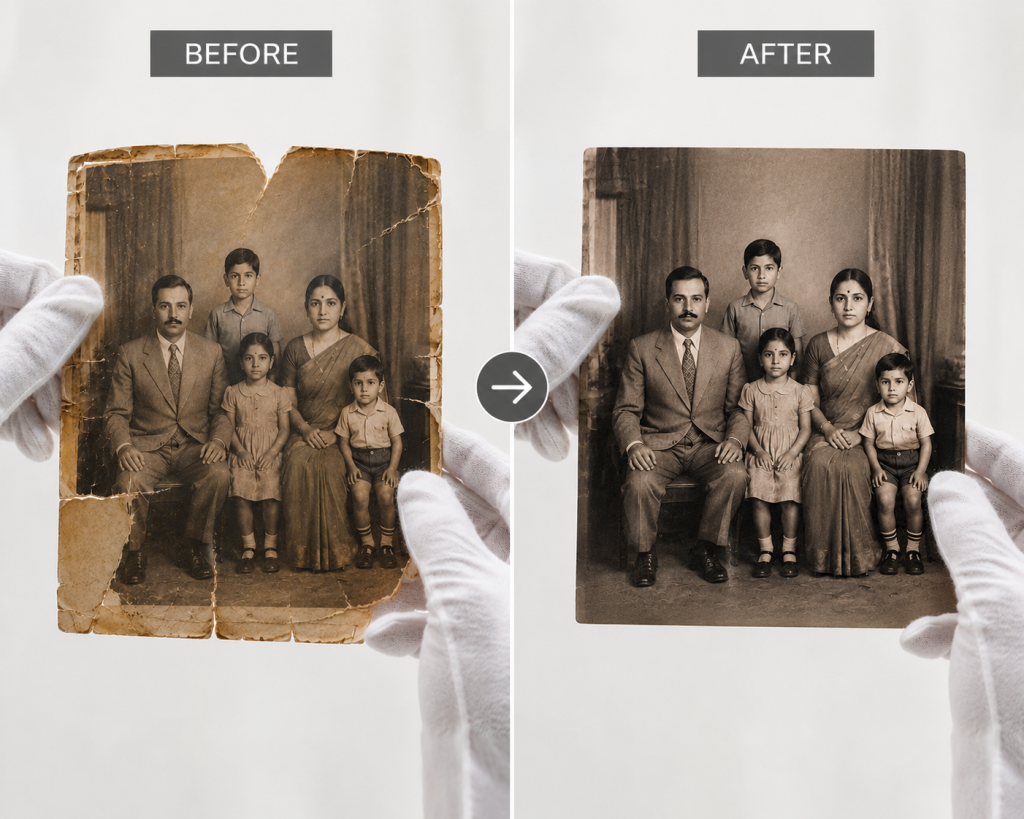
Whether you’re working in Photoshop or another tool, restoration typically follows this sequence:
1. Dust and scratch removal. Begin by addressing the smallest, most widespread imperfections — specks, scratches, and tiny tears. This cleans up the overall image before tackling larger problems.
2. Repair major damage. Use the Clone Stamp, Healing Brush, or Content-Aware Fill to address tears, stains, and large missing areas. Work in small sections and zoom in closely.
3. Correct tone and contrast. Faded photos often look flat and grey. Use Curves or Levels to restore the full tonal range — deepen the blacks, brighten the whites, and adjust the midtones.
4. Fix color. For color photos, adjust Hue/Saturation to bring back faded colors. Remove unwanted color casts (yellowing, greenish tint) using the Color Balance tool.
5. Sharpen details. Apply gentle sharpening using Unsharp Mask or the High Pass filter to bring back fine details like hair, fabric texture, and facial features.
6. Final review. Zoom out and examine the restored image as a whole. Check for inconsistencies in texture, lighting, or color between repaired and original areas.
Step 5: Colorizing Black-and-White Photos
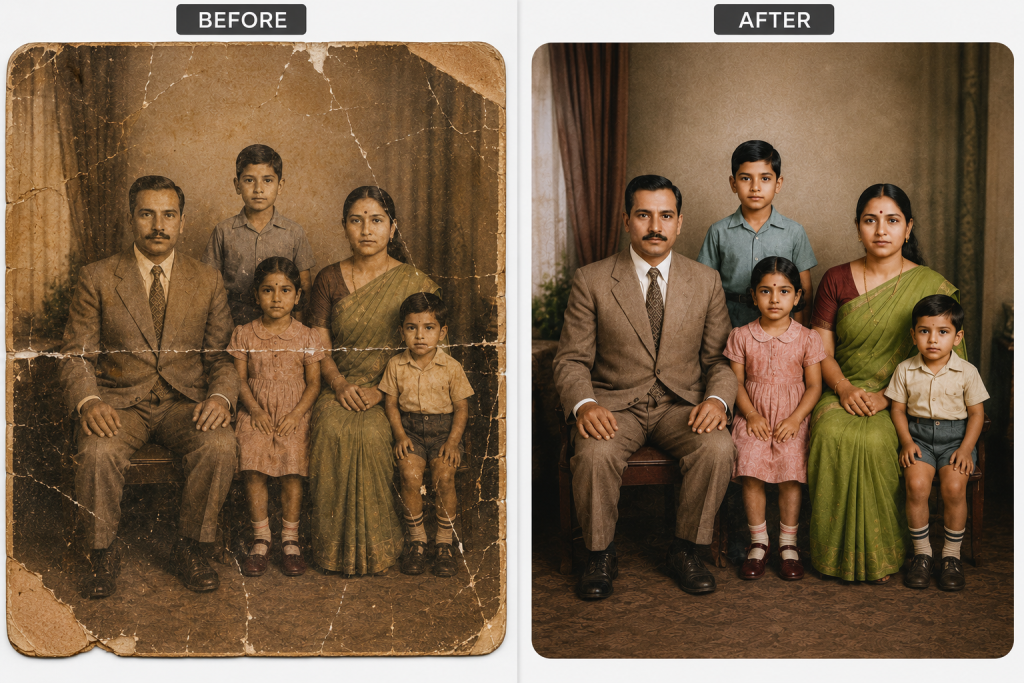
Colorization adds a striking new dimension to monochrome images. Modern AI tools can do this automatically in seconds, while manual colorization in Photoshop (using Color layers set to the “Color” blending mode) gives you creative control over every hue.
For realistic results, research the likely colors of the era — clothing styles, common paint colors, and skin tones — before you begin. Reference photos from the same time period can serve as a guide.
Step 6: Printing and Preserving the Restored Photo
Once your restoration is complete, consider having it professionally printed. Use a photo lab that offers archival-quality prints on acid-free paper — these can last over 100 years with proper care. Common print sizes for restored family photos are 5×7, 8×10, and 11×14 inches.
For long-term digital preservation:
- Save the final file as a high-resolution TIFF or PNG.
- Store copies on at least two separate devices or drives.
- Consider uploading to a cloud storage service for an off-site backup.
- Share digital copies with family members so the images are distributed and safe.
Quick Tips for Better Results
- Work at 100% zoom when making detailed repairs so you can see exactly what you’re doing.
- Save your progress frequently to avoid losing work.
- Take breaks and return with fresh eyes — it’s easy to over-process an image.
- Less is often more; the goal is a natural-looking result, not a perfect one.
- Always preserve the original scan untouched in a separate folder.
Conclusion
Restoring old photos is one of the most meaningful projects you can undertake — and it’s more achievable than ever. Whether you spend ten minutes with an AI app or ten hours with Photoshop, you’re doing something invaluable: preserving a piece of history and giving future generations the chance to see faces and places they might never otherwise know. Start with what you have, be patient with the process, and let the memories emerge.
How to Restore Old PhotosHow to Restore Old PhotosHow to Restore Old PhotosHow to Restore Old PhotosHow to Restore Old PhotosHow to Restore Old PhotosHow to Restore Old PhotosHow to Restore Old PhotosHow to Restore Old PhotosHow to Restore Old PhotosHow to Restore Old PhotosHow to Restore Old PhotosHow to Restore Old Photos